Windows Server 2016 Technical Preview 3 brings one of the most expected feature, Windows Containers. I know that it’s been a long time since it has been released and that there are a lot of articles about Windows Containers on the internet, but I’ve been busy with some personal stuff :).
What are Containers?
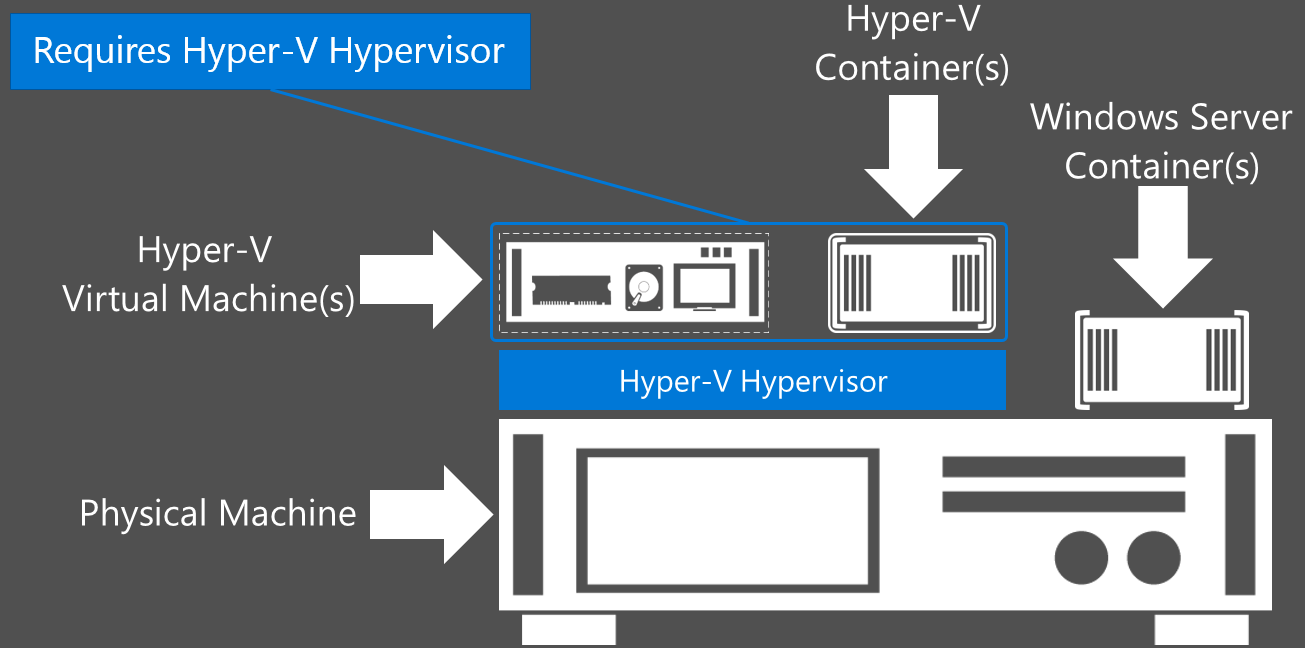
Containers are something new to the Microsoft world, but it’s been around for a while in the Linux world. This is a new layer of virtualisation, called OS virtualisation, where a container host is deployed either on a virtual machine or a physical host. On this container host you can deploy container os images as many as you want and they will share the container host resources. The nice thing about container is that they boot very fast and in a couple of seconds you have a full copy of Windows Server Core with IIS installed on it, way more faster than creating a virtual machine.

Windows Containers vs. Hyper-V Containers
Microsoft is going to provide two types of Containers, Windows Containers and Hyper-V Containers. The Hyper-V Containers requires Hyper-V Hypervisor and adds an extra layer of security and isolation, especially for application that shouldn’t share the same operating system. Both types of Containers use the same image format meaning that a Windows Container can be converted into a Hyper-V container and the other way around.
Now let’s deploy a Windows Container. You have 3 options when deploying a Windows Container:
- You can deploy on Virtual Machine running Windows Server Technical Preview 3 Server Core
- You can deploy it on a new Virtual Machine
- Or in Azure
If you are going to deploy it on a VM running WSTP3 Server Core as I did, you need to run wget -uri https://aka.ms/setupcontainers -OutFile C:\ContainerSetup.ps1 which will donwload a script that will configure the Windows Server Container components for you. If you want to deploy on a new Virtual Machine you need to run wget -uri https://aka.ms/newcontainerhost -OutFile New-ContainerHost.ps1.
Thanks to Aidan Finn which explains very well in his article what this script does and how can you change the IP Address range used . What I’ve did, I copied the ContainerSetup.ps1 script and edited it to make it use the DHCP and not NAT. You can easily activate DHCP when running the script by typing .\ContainerSetup.ps1 -UseDHCP. This might take a while depending on your internet connection.
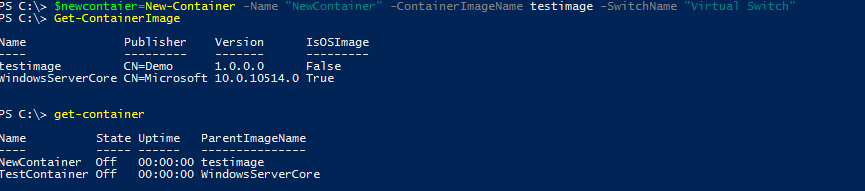
After that will have a container up and running on which we can run some commands. The command Get-ContainerImage will show you the default WindowsServerCore image. Based on this image, you can create your own images.

Before creating the first container you should run Get-VMSwitch to see what is the name of the switch available.

Now let’s create our first container by running $container = New-Container -Name “TestContainer” -ContainerImageName WindowsServerCore -SwitchName “Virtual Switch” and then run Get-Container. The Container state will be off and you can start it by running Start-Container -Name “TestContainer” and you can open a powershell session with Enter-PSSession -ContainerID $container.ContainerId -RunAsAdministrator.

Now that we have a container, we can create our ContainerImage using the command $newimage = New-ContainerImage -ContainerName TestContainer -Publisher Demo -Name testimage -Version 1.0.

We can create a new container based on the image recently created $newcontainer = New-Container -Name “NewContainer” -ContainerImageName newimage -SwitchName “Virtual Switch”
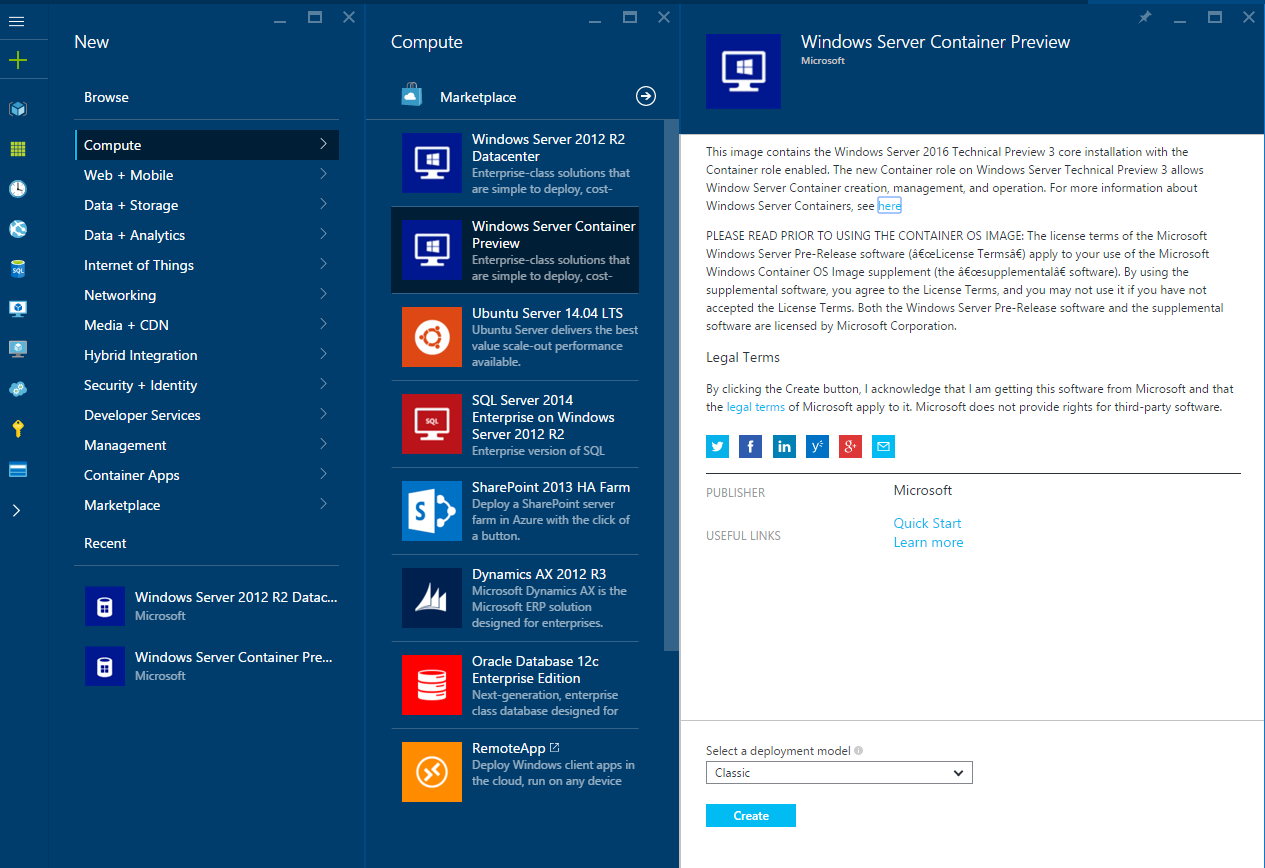
If you don’t want to go through all this process you can use the template from Microsoft Azure to deploy a new Container Host.
If you didn’t understand the container concept you can check Mark Russnovich article about container and also Aidan Finn has some articles on his own blog and also on www.petri.com where he explains very well the container stuff.
Be First to Comment